
how to add an image carousel in squarespace
If you've ever wanted to showcase a gallery of images on your Squarespace site without making visitors scroll through a long page, a carousel is exactly what you need. Carousels let you display multiple images in a single, compact section — visitors can swipe or click through them one at a time.
The good news? Squarespace has this built right in. You don't need any plugins, custom code, or third-party tools. In this guide, I'll walk you through exactly how to add an image carousel in Squarespace , step by step.
Why Use an Image Carousel on Your Squarespace Site?
Before we get into the how, let's quickly cover the why. Image carousels are one of the most effective ways to display visual content without overwhelming your visitors with too much at once.
Saves vertical space: Show 10 images in the space of one, keeping your page clean and focused.
Boosts engagement: Interactive elements like carousels encourage visitors to stay on your page longer.
Perfect for portfolios and shops: Ideal for showcasing product photos, client work, event galleries, and more.
Looks professional: A well-designed carousel instantly elevates the feel of any Squarespace page.
No code needed: It's a native Squarespace feature , anyone can set it up in minutes.

What You'll Need Before You Start
This post works on Squarespace 7.1 (the current version). Make sure you're logged into your Squarespace account and have your site editor open before following these steps.
Step-by-Step: How to add an Image Carousel in Squarespace.
1. Add a List Section to Your Page
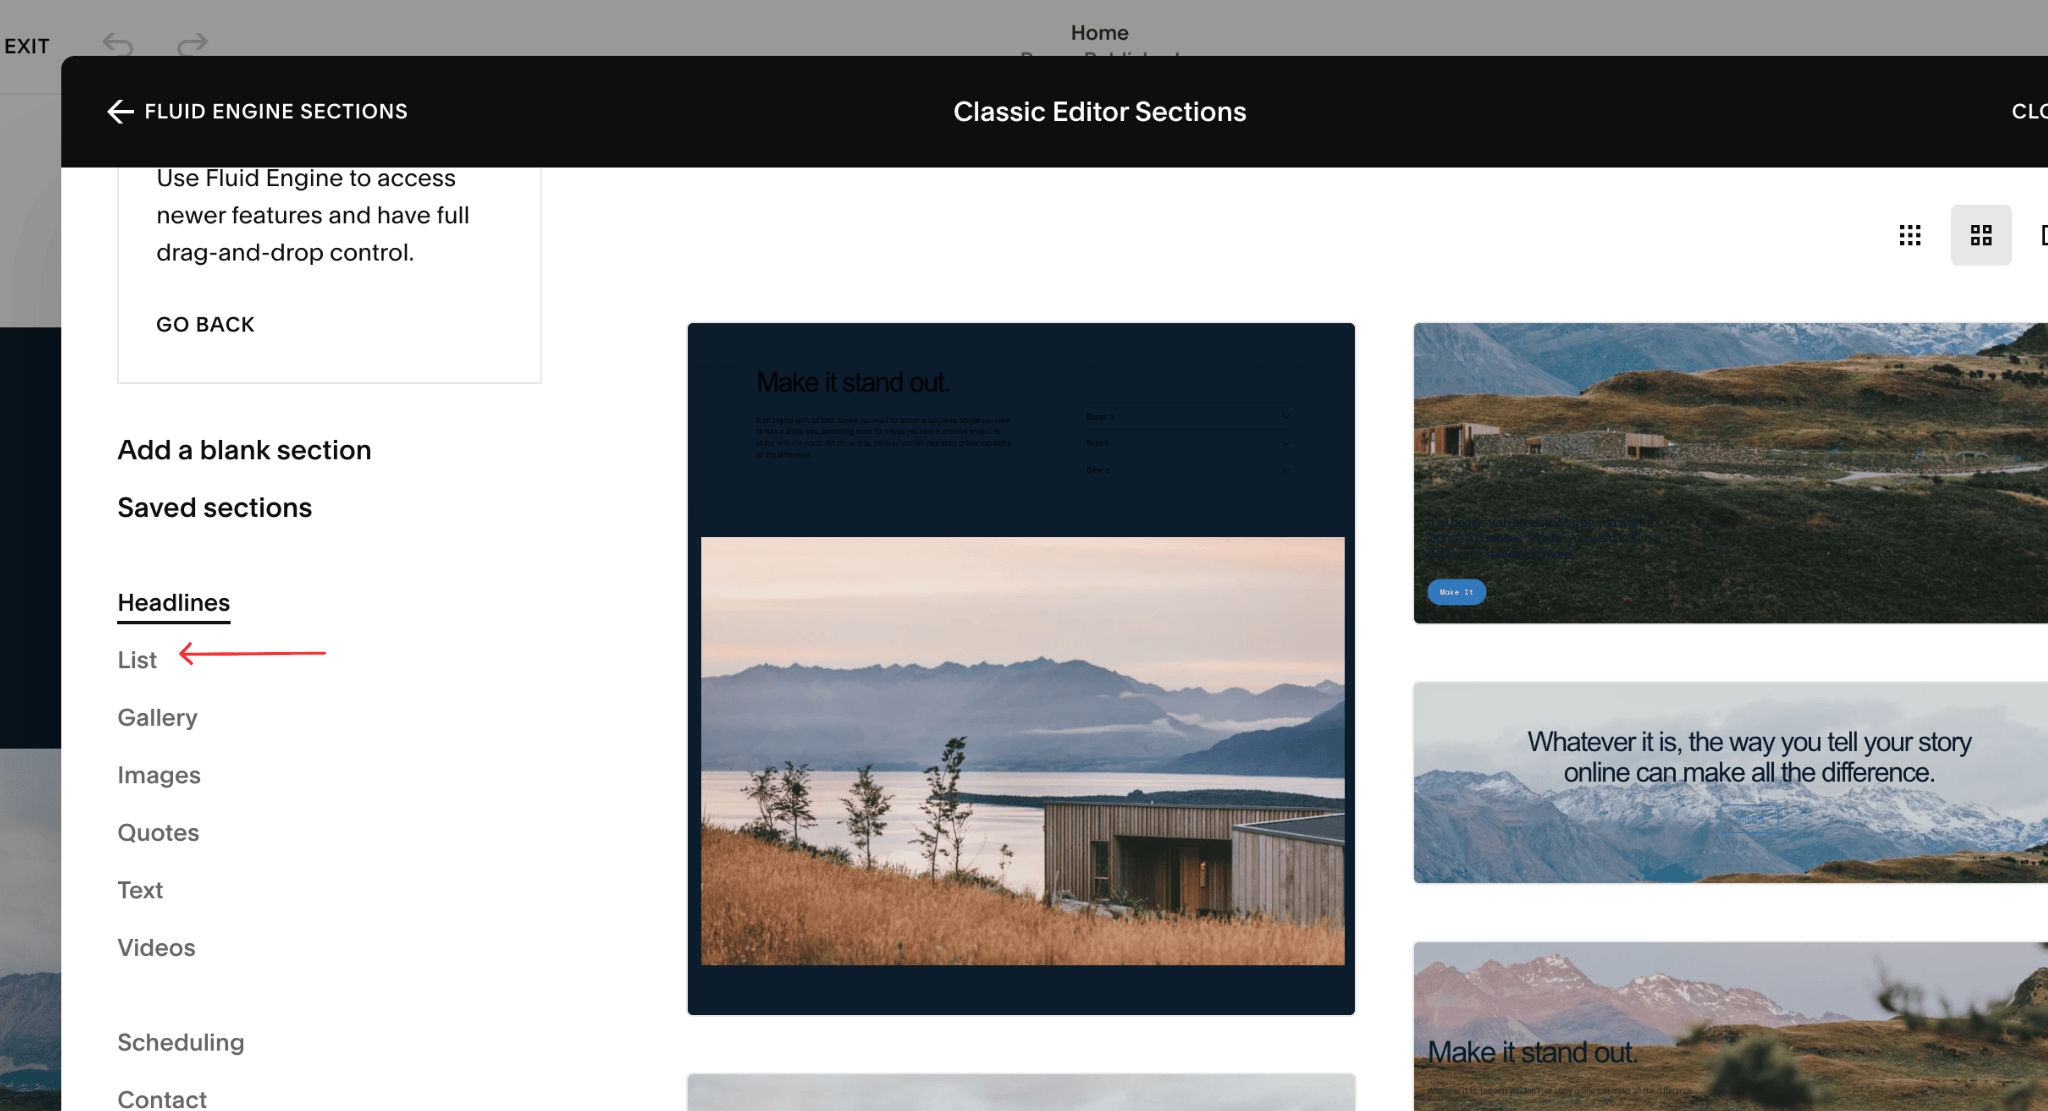
Start by opening the page where you want the carousel to appear. In the Squarespace editor, click the + button to add a new section. From the section library, choose List. This is the section type that supports the carousel layout , don't skip this step and try to use a standard gallery block, as that won't give you the carousel option.
2. Switch the Layout to Carousel
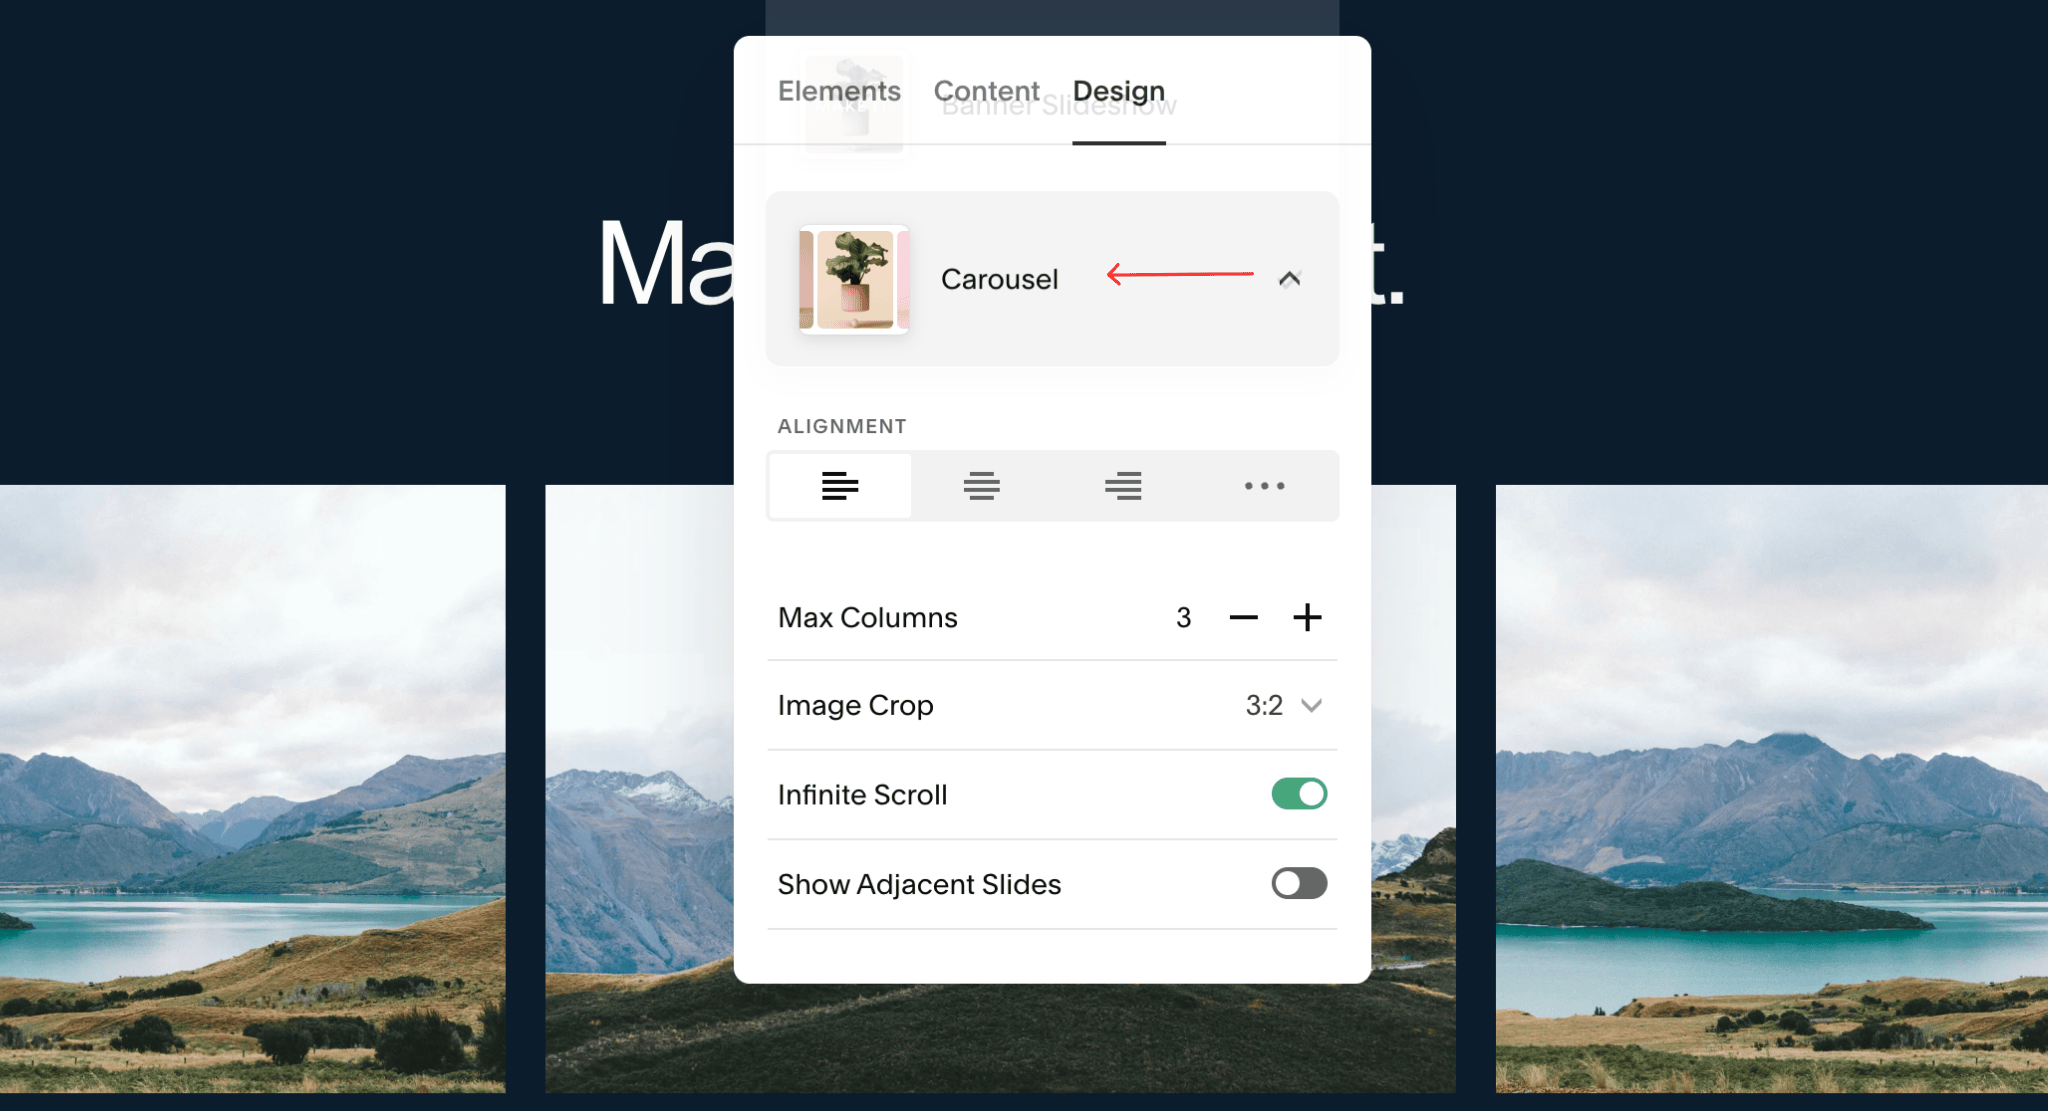
Once your List section is on the page, click into it to open the editing panel. Navigate to Edit Content → Design. Here, you'll see layout options for how the List displays. Select Carousel from the available options. Your section will immediately update to show a scrollable, carousel-style layout.
Edit Content → Design → Carousel
3. Add Your Images
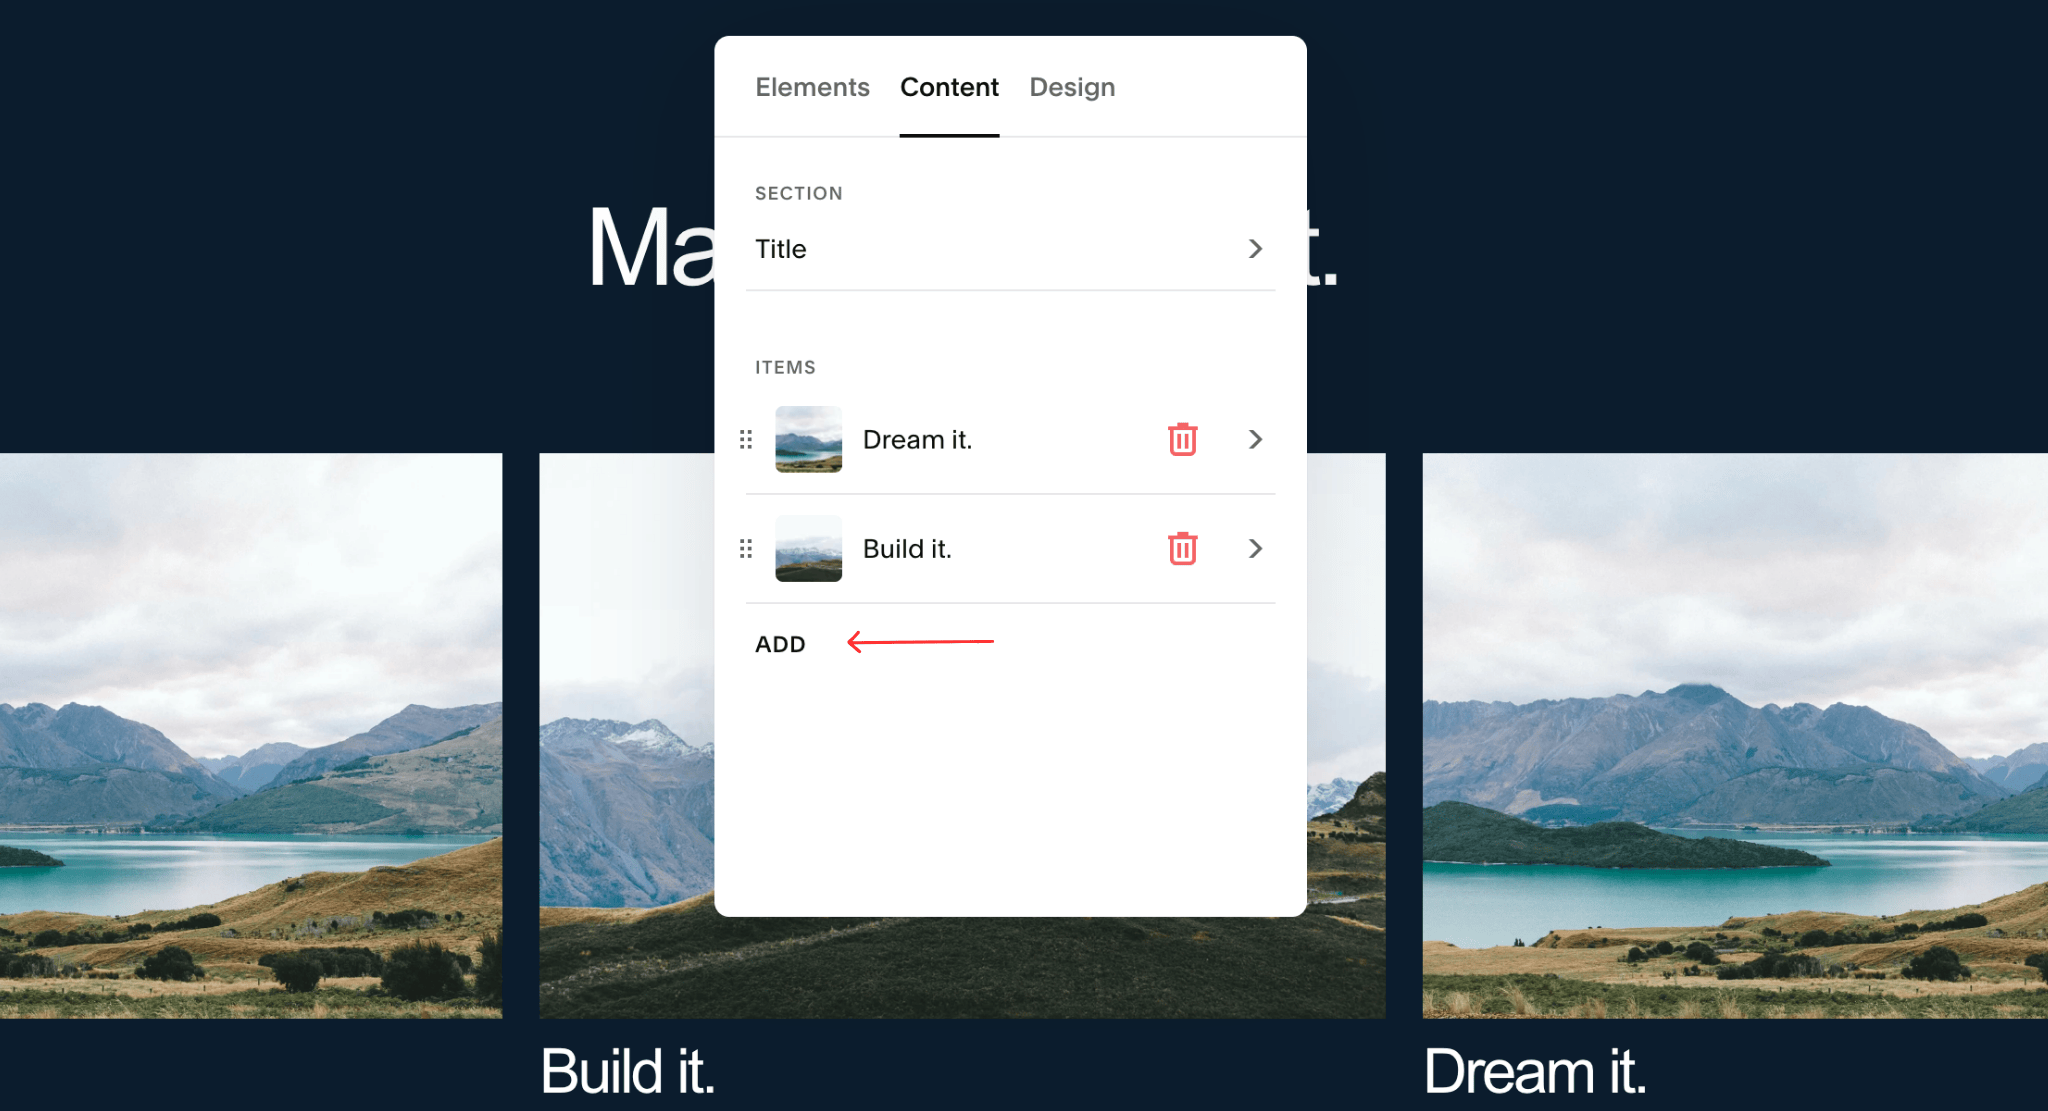
Now it's time to populate your carousel with images. Go to the Content tab within the same editing panel. You'll see an Add button — click this to upload or select your images. Repeat this step for each image you want to include in the carousel. You can add as many as you need, and reorder them by dragging.
Content → Add → Upload or select images
Pro Tip
For the best-looking carousel, use images with the same aspect ratio (e.g. all landscape or all square). Squarespace will crop them to fit the carousel frame, so consistent sizing prevents awkward cropping and keeps the design cohesive.